“Bring Your Designs to Life with Dye Sublimation Transfer Paper!” – SUBLIMATIONTRANSFERPAPER – High-Speed Sublimation Paper Factory, Dye Inkjet Sublimation Paper Wholesale, Made in China
Introduction
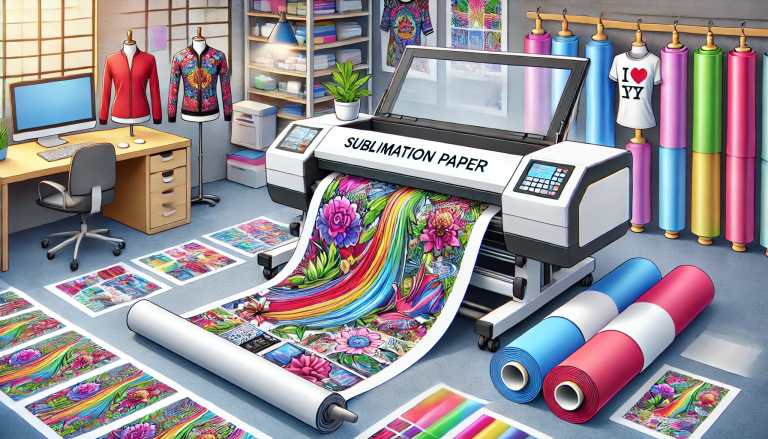
Dye sublimation transfer paper is a great way to add a unique design to a shirt. It is a process that uses heat to transfer a design from a special type of paper to a shirt. This process is relatively easy and can be done with a few simple steps. In this guide, we will discuss how to transfer dye sublimation transfer paper to a shirt. We will cover the materials needed, the steps involved, and tips for getting the best results.
Common Mistakes to Avoid When Transferring Dye Sublimation Transfer Paper to a Shirt
When transferring dye sublimation transfer paper to a shirt, there are several common mistakes to avoid.
First, it is important to ensure that the shirt is clean and free of any dirt or debris. If the shirt is not properly cleaned, the transfer paper may not adhere properly and the design may not be transferred correctly.
Second, it is important to use the correct temperature and pressure settings when transferring the paper. If the temperature is too low, the paper may not adhere properly and the design may not be transferred correctly. If the pressure is too high, the paper may be damaged and the design may not be transferred correctly.
Third, it is important to use the correct type of transfer paper. Different types of transfer paper are designed for different types of fabrics and may not work correctly if used on the wrong type of fabric.
Fourth, it is important to use the correct type of transfer paper for the type of printer being used. Different types of transfer paper are designed for different types of printers and may not work correctly if used on the wrong type of printer.
Finally, it is important to follow the manufacturer’s instructions for transferring the paper. If the instructions are not followed correctly, the design may not be transferred correctly.
By avoiding these common mistakes, you can ensure that your dye sublimation transfer paper is transferred correctly and your design is transferred correctly to the shirt.
Tips for Achieving the Best Results When Transferring Dye Sublimation Transfer Paper to a Shirt
1. Pre-treat the shirt: Before transferring the dye sublimation transfer paper to the shirt, it is important to pre-treat the shirt. This can be done by using a pre-treatment spray or by using a heat press to pre-treat the shirt. Pre-treating the shirt will help ensure that the dye sublimation transfer paper adheres to the shirt properly.
- Use the correct transfer paper: It is important to use the correct type of transfer paper for the job. Different types of transfer paper are designed for different types of fabrics, so it is important to make sure that the transfer paper being used is designed for the type of fabric that the shirt is made of.
- Use the correct temperature and pressure: When transferring the dye sublimation transfer paper to the shirt, it is important to use the correct temperature and pressure. The temperature and pressure should be set according to the instructions on the transfer paper packaging.
- Use a heat press: A heat press is the best way to transfer the dye sublimation transfer paper to the shirt. A heat press will ensure that the transfer paper adheres to the shirt properly and that the colors are transferred accurately.
- Allow the shirt to cool: After transferring the dye sublimation transfer paper to the shirt, it is important to allow the shirt to cool before removing the transfer paper. This will help ensure that the colors are transferred accurately and that the transfer paper adheres to the shirt properly.
Following these tips will help ensure that the best results are achieved when transferring dye sublimation transfer paper to a shirt.
Step-by-Step Guide to Transferring Dye Sublimation Transfer Paper to a Shirt
Step 1: Prepare the Shirt
Before you begin the transfer process, you must prepare the shirt for the transfer. Start by washing the shirt in cold water and allowing it to air dry. This will remove any dirt or oils that may be on the shirt and will help the transfer adhere better.
Step 2: Prepare the Transfer Paper
Once the shirt is ready, you can begin preparing the transfer paper. Start by printing your design onto the transfer paper using a sublimation printer. Make sure that the design is printed in reverse so that it will appear correctly on the shirt.
Step 3: Heat the Shirt
Once the transfer paper is ready, you can begin heating the shirt. Place the shirt on a flat surface and use an iron or heat press to heat the shirt for about 30 seconds. This will help the transfer adhere better.
Step 4: Place the Transfer Paper
Once the shirt is heated, you can place the transfer paper onto the shirt. Make sure that the design is centered and that there are no wrinkles or bubbles in the paper.
Step 5: Heat the Transfer Paper
Once the transfer paper is in place, you can begin heating it. Use an iron or heat press to heat the transfer paper for about 30 seconds. This will help the transfer adhere better.
Step 6: Peel the Transfer Paper
Once the transfer paper is heated, you can begin peeling it off. Start at one corner and slowly peel the paper away from the shirt. Make sure that you are careful not to tear the paper or damage the design.
Step 7: Allow the Shirt to Cool
Once the transfer paper is removed, you can allow the shirt to cool. This will help the design to set and will ensure that it will last for a long time.
Step 8: Enjoy Your Shirt
Once the shirt has cooled, you can enjoy your new shirt! You can wear it proudly and show off your design to everyone.
Conclusion
Transferring dye sublimation transfer paper to a shirt is a relatively simple process that can be done with a few basic tools. With the right materials and a bit of patience, you can create a unique and personalized shirt that will last for years. By following the steps outlined in this article, you can easily transfer dye sublimation transfer paper to a shirt and create a one-of-a-kind piece of clothing.